
 by
by Table of Contents
Importance of Code Quality Analysis in software development.
Code Quality Analysis is the measure of how well a software codebase meets specific standards, including readability, maintainability, reliability, efficiency, and security. It remains a key concern in software development owing to the following critical reasons:
- Reliability: Quality code reduces bugs, errors, and unexpected software behaviors. As a result, a developer ends up with a more reliable software product that can be trusted to perform as expected.
- Maintainability: Quality coding makes the software easier to understand, modify, or maintain. A developer experiences less difficulty when working on a piece of code over a longer period.
- Scalability: High-quality code makes it easier for the system to adapt to evolving requirements. It makes it much simpler to incorporate new functionality in the software and accommodate increased traffic.
- Efficiency: Optimized code executes rapidly. An enhanced code minimizes the amount of resources required to operate, allowing developers to create software that performs faster and more efficiently.
- Security: A poorly written code is prone to attack. Allowing low-quality code puts sensitive information battles and raises several security concerns.
SonarQube Server & Sonar Scanner for Code Quality Analysis
Step 1 : Click here to setup SonarQube server in windows OS
Step 2: Sonar Scanner Setup in Windows OS:
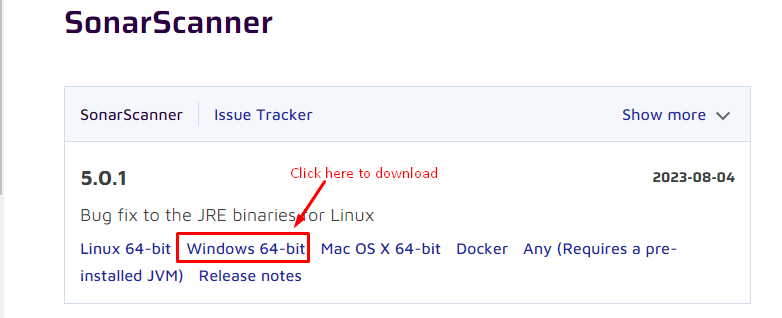
To obtain the SonarQube Scanner, follow these steps:
- Visit the Sonar Scanner download page.
- Choose the appropriate version for your operating system (e.g., Windows, macOS, Linux).
- Download the Sonar Scanner package to your local machine.
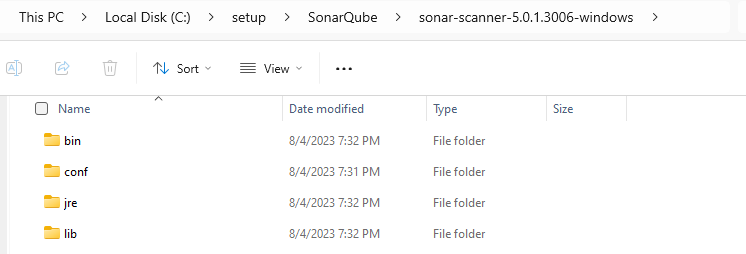
Step 3 : Extract the Scanner Package:
Unzip the downloaded SonarQube Scanner package to a directory on your machine.
Step 4 : Set Environment Variables (Optional):
If necessary, set environment variables to specify the location of the SonarQube Scanner executable. This step is optional if you plan to run the scanner from its installation directory.
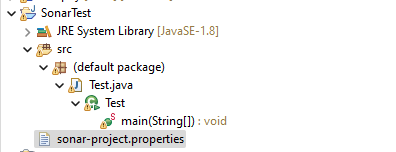
Creating a Simple Java Project:
Creating a new Java project: Guidelines for setting up a basic Java project using your preferred IDE.
In the root directory of your Java project, create a file named sonar-project.properties if it doesn’t already exist. This file contains configuration settings for the SonarQube analysis.
sonar.projectKey=sonartest
sonar.projectName=SonarTest
sonar.projectVersion=0.21.0
sonar.sources=src
sonar.login=your_sonarqube_server_username
sonar.password=your_sonarqube_server_password
sonar.host.url=http://localhost:9000
Replace http://localhost:9000 with the URL of your SonarQube server, and your username , password with your SonarQube login credentials.
- sonar.projectKey=sonartest:
- This property specifies a unique identifier for your project in SonarQube. It helps SonarQube distinguish between different projects. In this case, the project key is set to “sonartest”.
- sonar.projectName=SonarTest:
- This property sets the name of your project in SonarQube. It’s a human-readable name that helps identify the project. Here, the project name is “SonarTest”.
- sonar.projectVersion=0.21.0:
- This property indicates the version of your project. It helps track changes and improvements over time. In this example, the project version is “0.21.0”.
- sonar.sources=src:
- This property specifies the source code directories that SonarQube should analyze. Here, the source code is located in the “src” directory.
- sonar.login=your_sonarqube_server_username:
- This property sets the username used to authenticate with the SonarQube server. Replace “your_sonarqube_server_username” with your actual SonarQube username.
- sonar.password=your_sonarqube_server_password:
- This property sets the password used to authenticate with the SonarQube server. Replace “your_sonarqube_server_password” with your actual SonarQube password. Note: Storing passwords in plain text in configuration files is not recommended for security reasons. Instead, you can use authentication tokens or other secure methods.
- sonar.host.url=http://localhost:9000:
- This property specifies the URL of the SonarQube server that will receive the analysis results. In this example, the SonarQube server is assumed to be running locally on port 9000. Replace this URL with the actual URL of your SonarQube server.
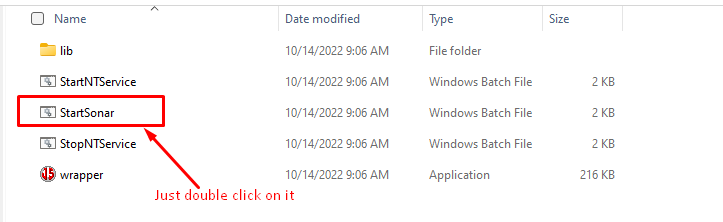
Start SonarQube Server:
- Open a terminal or command prompt.
- Navigate to the
bindirectory inside the extracted SonarQube folder. - Execute the appropriate script or command to start SonarQube based on your operating system:
- On Windows: Run
StartSonar.bat. - On Unix/Linux/macOS: Run
./sonar.sh start.
- On Windows: Run
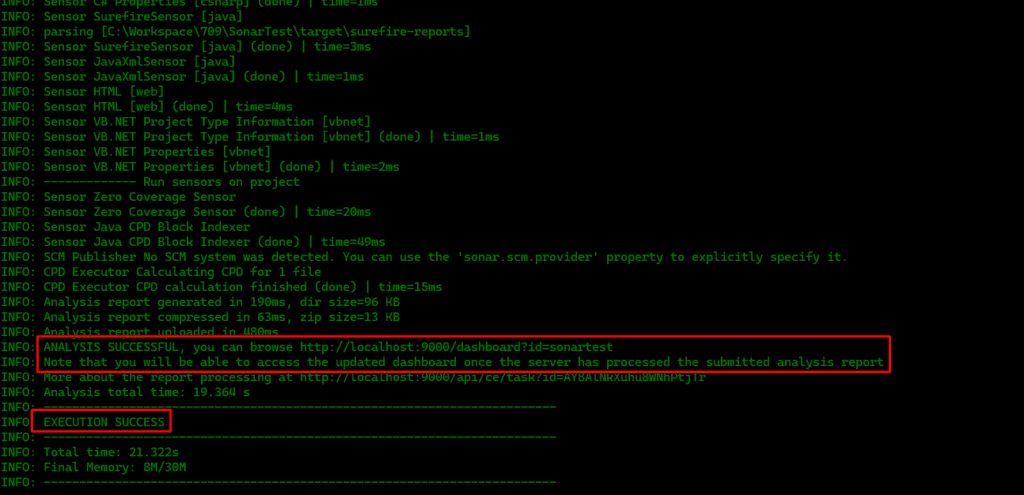
Run Sonar Scanner: SonarQube Analysis
- Navigate to the directory containing your Java project in the command line.

2. Execute the SonarQube Scanner by running C:\your_sonar-scanner_path\bin\sonar-scanner.bat and ensure your SonarQube server is running to receive the analysis results.

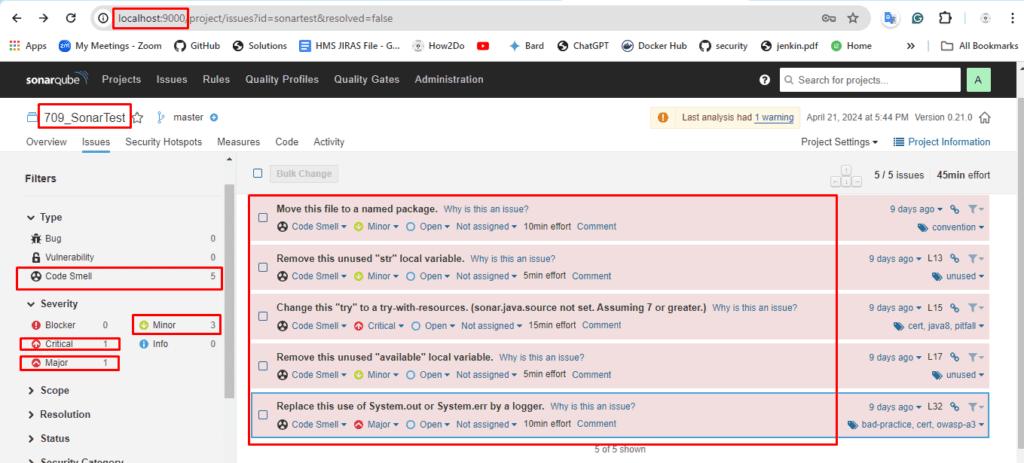
Viewing Results in SonarQube Dashboard:
- Navigating to the SonarQube dashboard in a web browser.
- Understanding the metrics and feedback provided by SonarQube.
- Addressing Issues and Improving Code Quality
Conclusion:
- Recap of the benefits of using SonarQube for code quality analysis in Java projects.
- Encouragement for developers to integrate SonarQube into their workflows for ongoing code quality improvement.

Heya i for the first time here. I came across this board and I find It truly useful & it helped me out much. I hope to give something back and help others like you aided me.
You need to take part in a contest for probably the greatest blogs on the web. I’ll advocate this site!
Wow! Thank you! I constantly needed to write on my blog something like that. Can I include a portion of your post to my site?
Fantastic beat ! I would like to apprentice while you amend your site, how could i subscribe for a blog website? The account aided me a acceptable deal. I had been a little bit acquainted of this your broadcast provided bright clear idea
Love from Hamburg
This information is gold. Thank you!
I appreciate how you broke down this complex topic into manageable pieces. Your clear explanations and real-life examples made it so much easier to understand.
Simply wish to say your article is as astounding. The clarity for your post is simply nice and i could think you’re knowledgeable in this subject. Well with your permission allow me to snatch your RSS feed to stay updated with impending post. Thank you one million and please keep up the enjoyable work.